
Create Your Magazine Layout
When a book or magazine is open, the page on the left & right together are called a 'spread.'
You need...
Compose Your Final Layout
*Choose PowerPoint or Word1: Add All of Your Components
If you are working in Word...
Page size should be 2 pages 8.5" x 11" or 1 page 17" x 11"
1. Insert and edit the photo of your food *Click Format and adjust as needed
In PowerPoint or Word...
2. Create a text box and type the title of your article
3. Type your name as the byline 4. Type the paragraph about your meal: -Describe your food -Tell how it relates to you, when you eat it -Write about where your dish comes from (think back to your research and the food map) 5. Add your recipes 2: Format: Include Features of Good Design
1. Look at your example layout
2. Move text boxes and images into position 3. Make the title a larger size than the rest of your article 4. Change the text to a contrasting color from the background -You lose major points if we can't read it 5. Remove unneeded text box borders 6. Adjust textboxes to have more transparency: Make a textbox more transparent in Word: -Click the textbox so it is selected -Click 'Format' -> 'Shape Fill' -> 'More Fill Colors' -Slide the bar under Transparency 3: Last Check
|
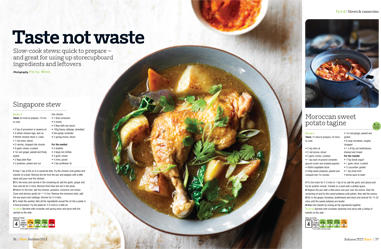
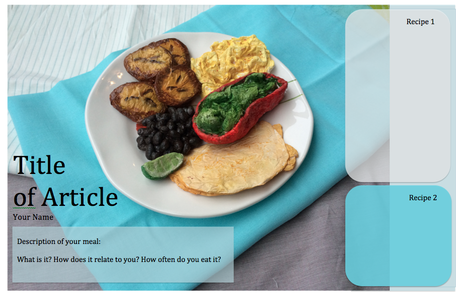
Option A: Food on one page, text on opposite side
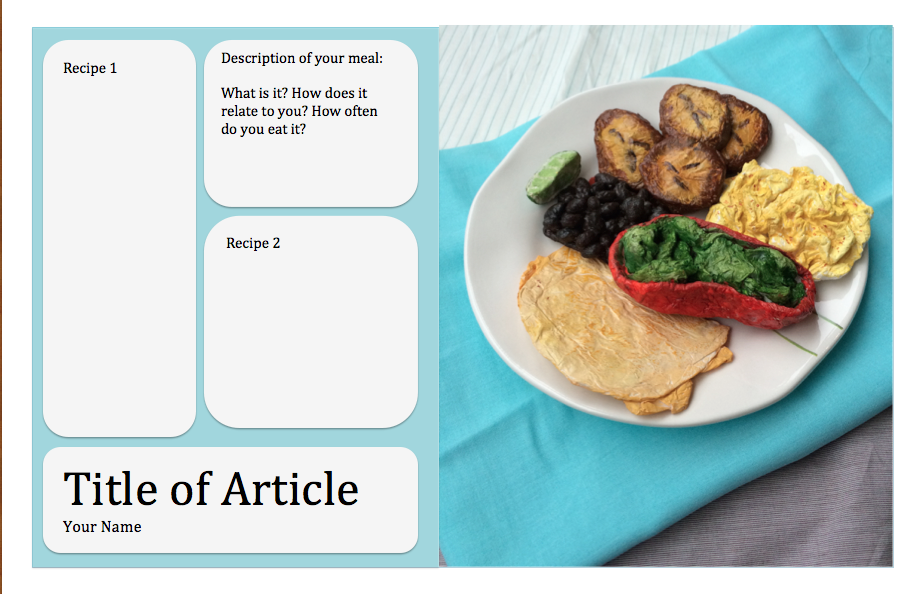
Option B: Food photo stretching across the page with text on top
|

- 2 Pages vertical (8.5 x 11) or 1 page horizontal (11 x 17)
- Food photo is large and draws attention
- No large areas of empty space
- Whole page is used
- NO actual photos of the meal you are cooking- only the photos of your sculpture
- Your name signed as author of the article
- Text and title are legible and sized to fit the space
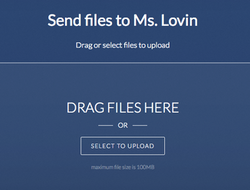
Save & Submit Your Work
1. Save the final as your name
2. Send to Ms. Lovin (lovinart) or share via Office 365
2. Send to Ms. Lovin (lovinart) or share via Office 365
How Do I get Graded?
|
Done Early?
Explore Color Theory
- Jackson Pollock was a famous painter in the 1940s and 50s best known for his paintings he made on the floor where he splattered paint. Create your own Pollock inspired work by clicking the link and dragging the mouse. When you click the mouse it will change colors. http://www.jacksonpollock.org/
- Test your knowledge of the color wheel by matching the color they show you. http://color.method.ac/
- Look at the image and count how many colors you see. Scroll down and read about the results: http://www.higherperspectives.com/all-the-colors-1406173892.html
- Color Challenge Game: Drag the squares around to arrange them in order of color. A perfect score is 0. It takes time to get it right, so pay attention! http://www.xrite.com/online-color-test-challenge
3 Choices to Create in SUMOPaint
A. Design your own company or product and make a label for something you sell.
-Product Name
-Image/ Design
-Slogan
-5 different layers
-Change transparency
-Use smudge tool somewhere
B. Make a non representational work of art.
- Create 6 or more layers
-Use 3 or more different brushes
- Change transparency of 2 layers so they show through
-Use smudge tool
-Change the color temperature of one layer
-Use the magic want to erase part of one layer away
C. Create a character or monster.
-Make 5 total layers
-Draw the outlines using the pencil or ink tool
-Fill in areas with the paint bucket tool
-Change the transparency of one layer
-Use the clone stamp to recreate an area of your work
-Add an image in the background to create a setting
-Add text to give your character a name
